Why should you use a chatbot to check order status?
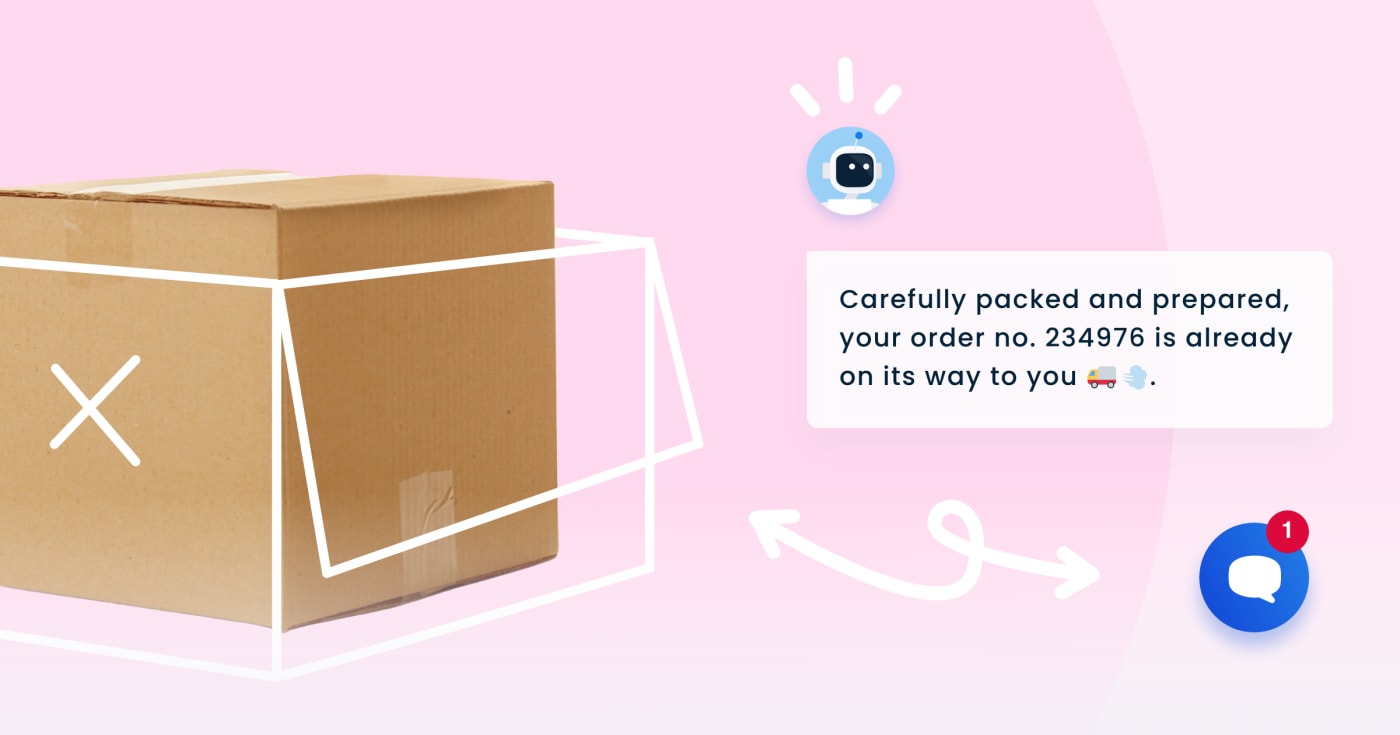
From our customers' experience and feedback we know, that question about the order status is one of the most common questions they receive. This new feature allows you to automatically import order status information directly into your Smartsupp account, so you no longer have to answer these questions yourself. Everything will be done automatically and within a few minutes, your customer will be informed about the status of their order directly by the chatbot.
How does the automatic verification of order status work?
The chatbot for order status is a pre-designed chatbot that is able to provide your customer with information about the status of their order. The chatbot is connected to the Shoptet system, from which it retrieves the order status information and then, using pre-designed texts for the specific order status, communicates it to the customer.
Shoptet offers 4 basic order statuses:
- Unserved
- Pending
- Served
- Canceled
More information about specific order statuses can be found directly on the Shoptet website here.
Note: You can edit the texts of the 4 basic order statuses as well as your custom statuses according to your needs. Find more information on how to change the texts here.
However, other chatbot texts cannot be edited. If you'd like to see what the whole chatbot flow looks like, you can check it here.
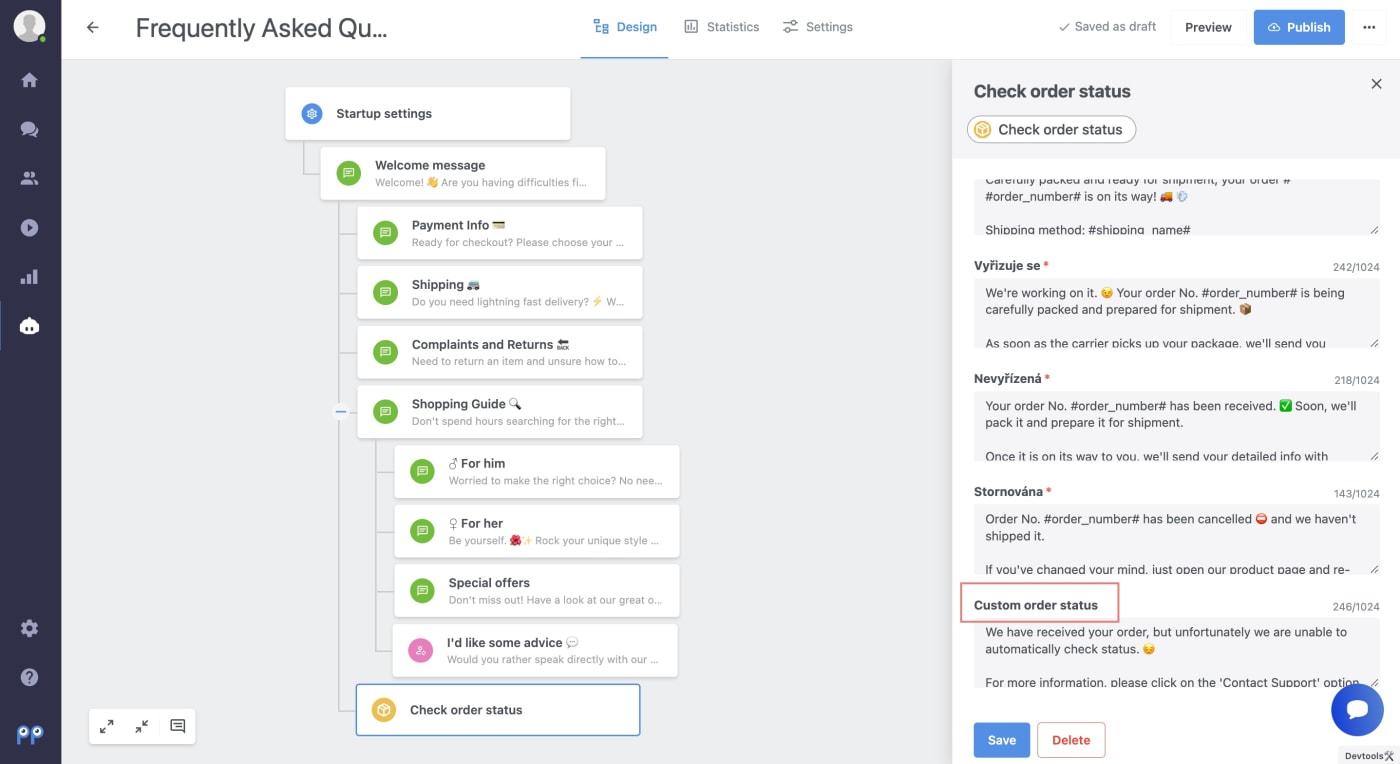
Custom order status
If you have created a custom order status in Shoptet, you need to create a text for it. Instructions on how to create the text can be found here.
What do the interactions between the chatbot and the visitor look like?
When a visitor clicks on the Check Order Status button, the chatbot will react as follows:
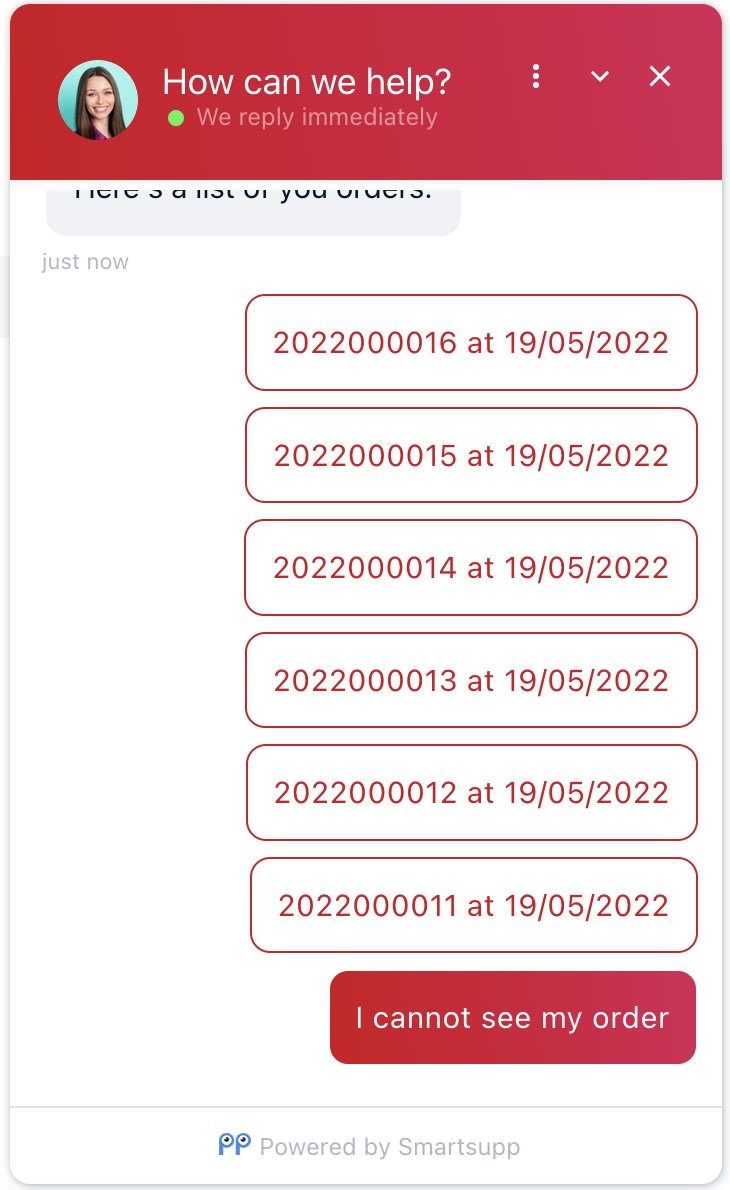
1. If the visitor is logged into their account on your store, the chatbot will automatically display their latest orders. After clicking on a particular order, the chatbot displays information about the status, delivery, and payment method. Chatbot always displays a maximum of 6 orders.
If customers can't find the order they're looking for, they can click on the I cannot see my order button, and the conversation will be transferred to a human agent with the possibility to write the message.
2. If the customer is not logged in to your store, the chatbot asks them to provide the order number or the email address which was used when creating the order. Based on this information, the chatbot finds the order in your system and displays a corresponding answer If the customer provides an email, which is used for multiple orders, the chatbot again shows the last 6 orders.
If the customer enters an incorrect email or order number twice in a row, the chatbot offers them the option to try it again or contact support.
Note: These animations show the preset texts of 4 basic order statuses. If you'd like to edit them or add your own custom statuses, you can find the instructions here.
However, other chatbot texts cannot be edited. If you'd like to see what the whole chatbot flow looks like, you can check it here.
How to activate this feature?
This chatbot feature is available only for Shoptet users and it's included in the new Smartsupp+ add-on.
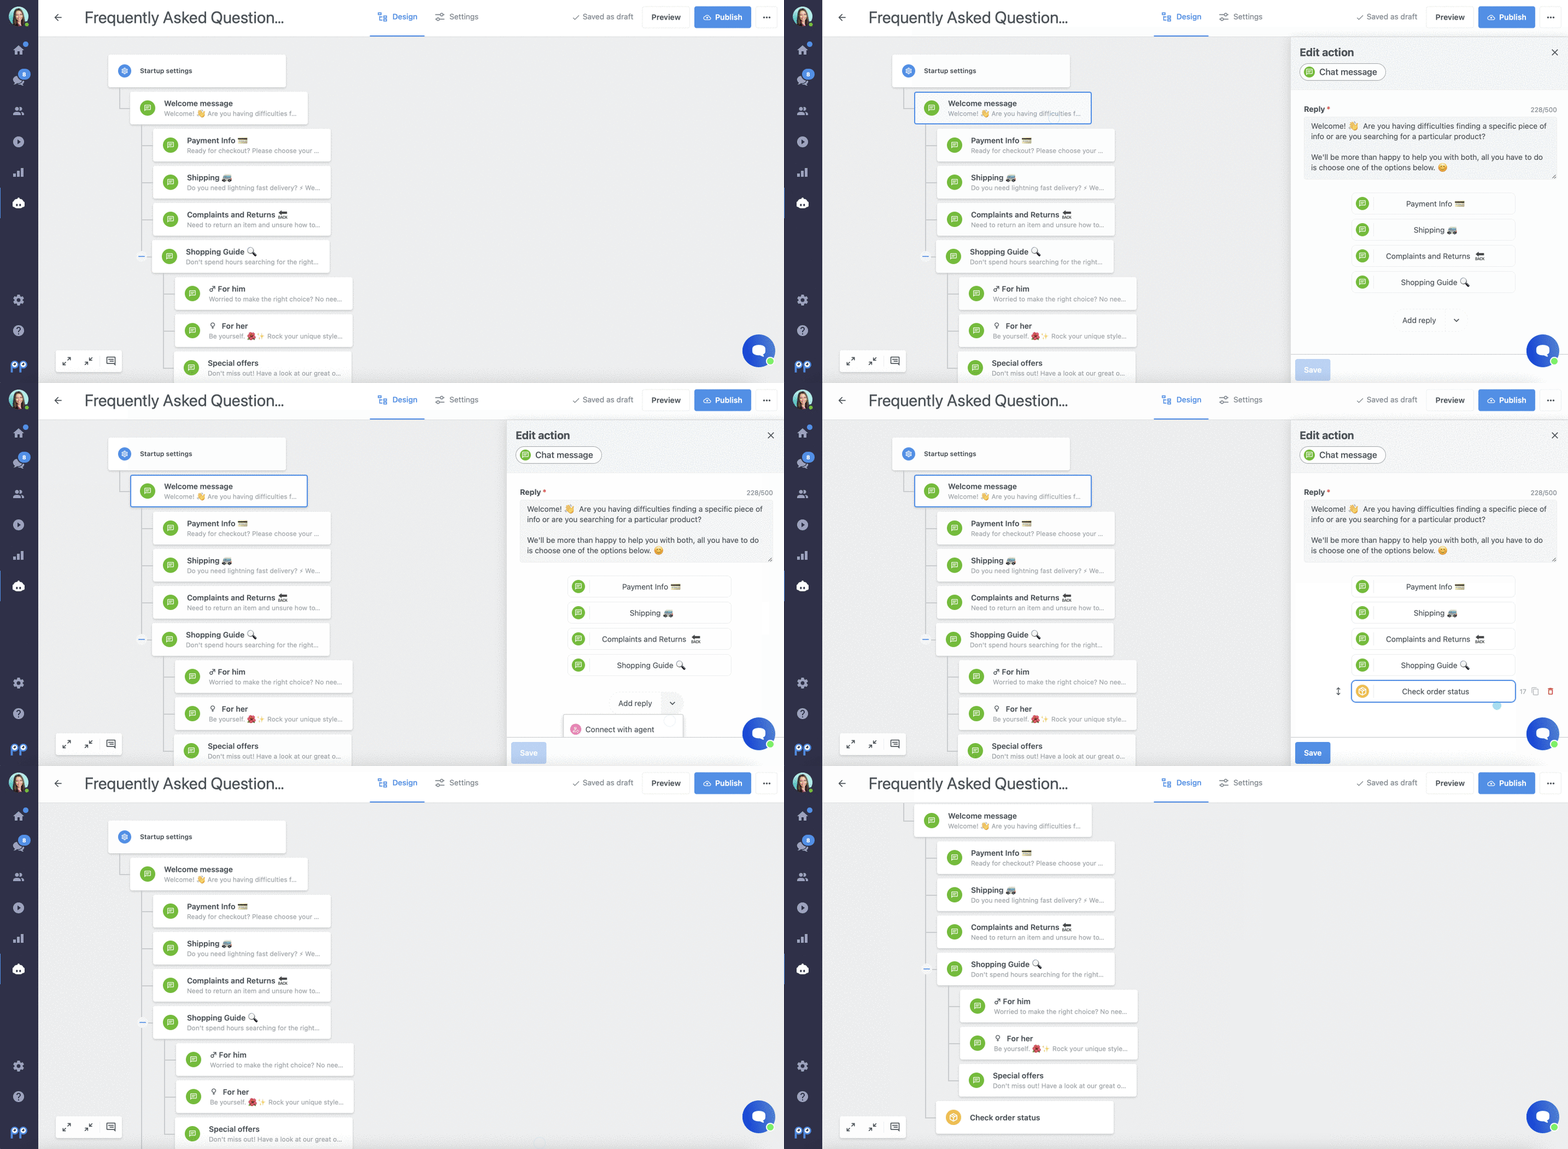
You can set it up in the Chatbot tab directly in your account. Here you can either create a new chatbot or select an already existing one and choose the branch where you want to place the button with the order status check. If you haven't worked with a chatbot before, you can first review this tutorial to learn how to work with a chatbot.
Then just click on the Add reply button (1) and select the Check order status option (2) (you can use the predefined text for this button or add your own).
How to edit or create texts for order statuses?
All order statuses that you have defined in the Shoptet are automatically imported into the chatbot. For the 4 basic statuses offered by Shoptet, we have already predefined the texts, but you can edit or completely overwrite them. You can do so in the Chatbots tab >> Next, select the chatbot with the 'check order status' feature enabled >> Click on the Check order status (1) >> Text settings (2).
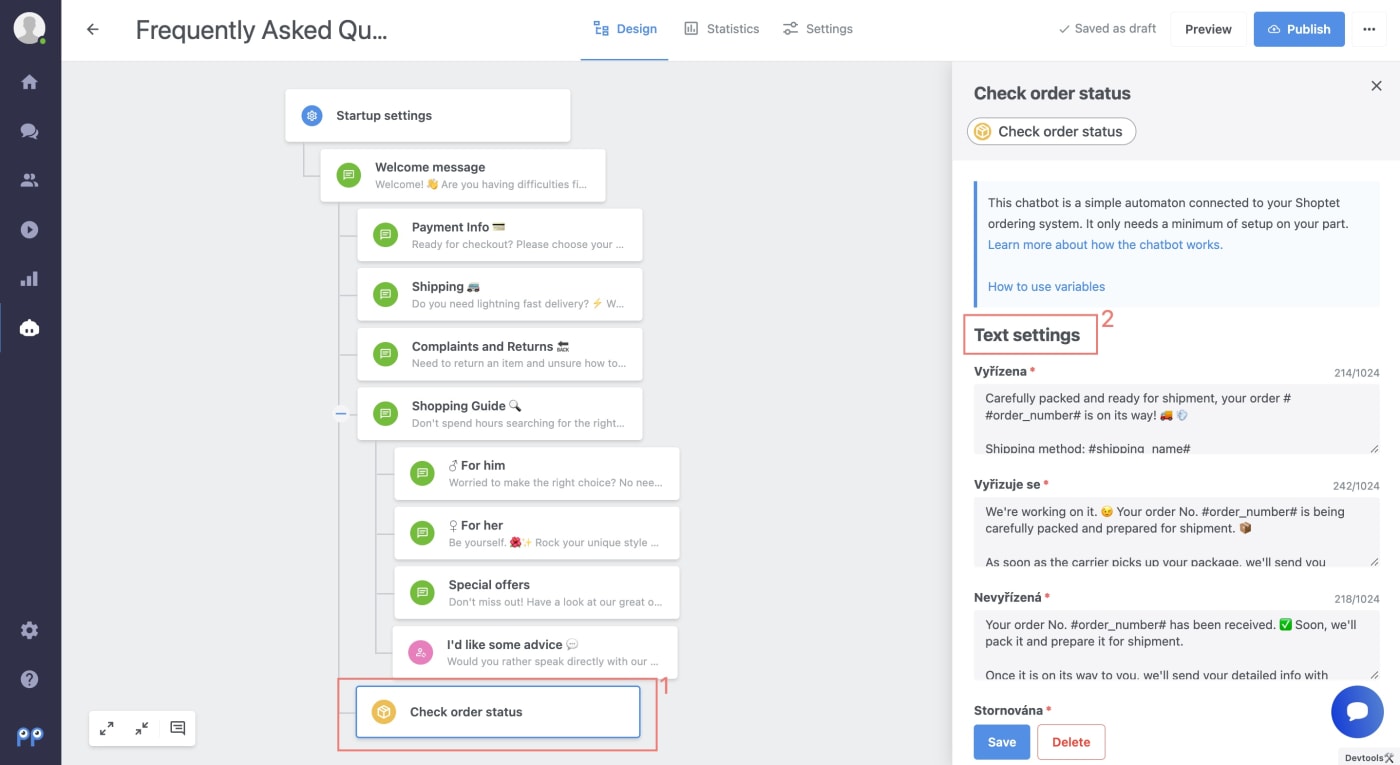 At the top of the panel, you'll see 4 basic order statuses and when you scroll down you'll find your own custom statuses.
Note: The 4 basic order states cannot be removed from the chatbot. You can only change their texts.
If you edit or update the texts, don't forget to include variables (e.g. order number, shipment number, etc.) that import information from the system into the chatbot message. Therefore, we have created a table where you can find all the variables that can be used within the chatbot:
| Order Number | #order_number# |
| Parcel Number | #payment_name# |
| Transport method | #shipping_name# |
| Shipment tracking link | #shipping_tacking_link# |
The text with variables will then look like this:
Carefully packed and ready for shipment, your order # #order_number# is on its way! 🚚 💨
Shipping method: #shipping_name#
Payment method: #payment_name#
Now you can just look forward to receiving your package.
Problem with the integration
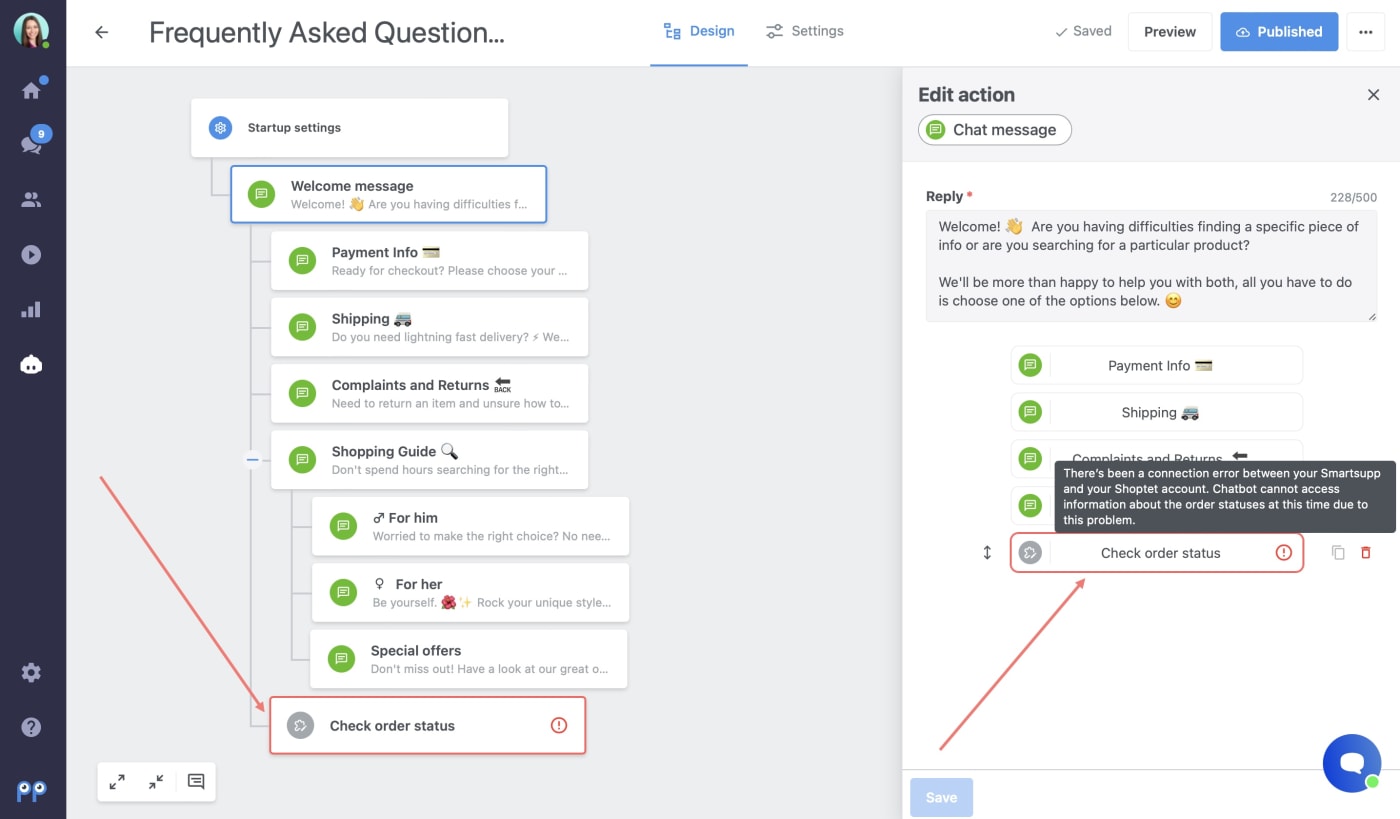
If there is a problem with the connection between Smartsupp and Shoptet, the chatbot behaves in the following way:
1. Chatbot displays the following message:
2. A visitor who has already started interacting with the chatbot, will receive a response that there’s been a system error and a text area appears so they’ll be able to send you a message via chat box. You can check what text is displayed to the visitor here.
However, if the visitor refreshes the page (e.g. goes to another page), the entire chat box disappears from the website, and the connection drops.
Tips and tricks
To get the most out of this feature, it is important to set it up and use it correctly. That's why we've put together some tips and advice on how to set up the chatbot in combination with our other features.😉
Hide a text area
When you deactivate the text area in the chat box, only the chatbot will be displayed to your customers. This way, you motivate your customers to check the chatbot first and find the answers to their questions there instead of immediately sending a message to an agent. If you are interested in this feature, you can read about how to set it up here.
However, if the customers don't find the info they’re searching for, they can still contact your support by clicking on the "Contact Support" button in the chatbot. (see the Chatbot Texts)
Deactivate other automatic messages
If you have an active chatbot, along with the inactive text area, no automatic messages or chatbots will load once the chatbot is launched. If you want to have multiple active chatbots and automatic messages that load sequentially in the chat box (e.g. by URL), it’s necessary to leave the text area active.
If you are using this feature, it is only possible to use the "We are busy" and "We are offline" automatic messages, which are sent to the visitor after they write and send a message on the chat.
